Archive | Blog

RSS feed for this section

Larrys

Around this time of year, I usually write a gift guide post. I’ve done it the last two years of this blog, here, here, here, here & here 😉 Fun, design-y options for all the people on your list. This year, though, I haven’t felt like it. At least I haven’t felt like sharing it in this space. Maybe I’ve had too much going on. Maybe the world has had too much going on. And don’t get me wrong, I’ll still shop and celebrate and if you want to catch a peak at the stuff on my wish/not gonna happen list you can check it out on my Pinterest (and follow me too please, if you don’t already!). But it has felt strangely unsatisfying to write about. Work has been so intense of late and the usual juggling job that most (all?) moms face every day has taken up all of the remaining space in my crowded brain. As per usual. And the world around me, the news, has been such a roller coaster of hard and awful and hopeful and sweet and awful again. It’s just too much and well a gift guide didn’t feel appropriate.

But work, wow, work!, that has been a really crazy thing. And the craziest of all of my current projects is a pretty exciting one. For the last few months (6 months to be precise), I’ve been working on a café-restaurant with my Lawrence and Boucherie partners, called Larrys or The Money Pit, as I like to call it. Larrys because we live in Quebec and we can’t use the apostrophe that you’d normally use when writing Larry’s. Here for your reading/viewing pleasure is the story of how Larrys came to be and what it is still in the process of becoming…

For many years, my partners and I have been eyeing the café restaurant two doors down from us. It has in the last five years been 3 or 4 different businesses. Some successful, some not. Either way it was left empty last December. We decided to make our move. We want to open a café restaurant: open early with great coffee and breakfast options then open from 11:00 am on and late into the night with great food and great drinks. A more casual, almost bar-like spot to get a quick bite and a pint or linger with a bunch of food and wine. This spot could become a great neighbourhood hang out joint and definitely fits in with the Lawrence family. It’s the little brother if you will (the way my 6 year old has been explaining it to everyone ;-)).

Luckily/worst news ever, the landlords of Lawrence also own the Larrys building. I say building but this is being generous: it is a covered alleyway. Two exterior walls on either side, a draft-y, hole-filled back door, four sliding window panes with huge gaps where the air comes in. But more on that later. The landlords gave us a key and agreed in principle to rent us the space. This is what it looked like when we walked in:

IMG_5834IMG_5842IMG_5849IMG_5840

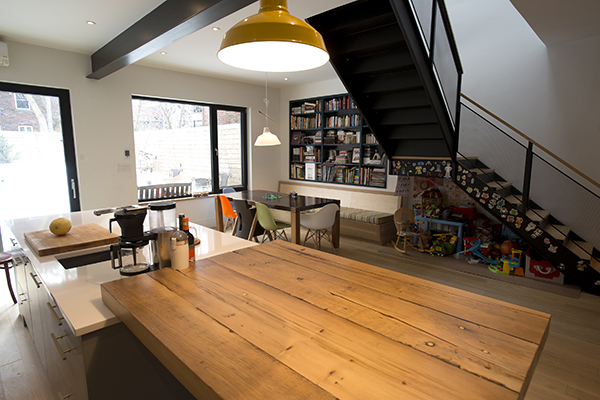
This is what I wanted it to look like:

whyteandbrownsoholondon2 2014.08.08_Curbed_SohoHouse_31 X9A3251

No disrespect to previous owners/decorators: it was always dark and super woody and very “ye olde pub” with the faux tin tiles and the pipes and the dark woods. It always felt kind of like a film set café, everything was faux finished. My plan was to lighten and brighten. Originally, we thought we’d just give ‘er a coat of paint and remove some of the excess decor/tin etc. And I also realized that behind the yellow-y banquette wall was some brick.

image1 FullSizeRender_3 FullSizeRender_4

So I had a couple of guys come in to start the demo work. Easy peasy take down of the busy-ness above the bar and removal of the plaster that was covering the brick. And then the problems started…The brick was excruciating to expose as the layer on top was too thin to sandblast without wrecking the brick. And the kicker: when we removed the tin section above the bar we found a warped and soggy gypsum ceiling, crazy wiring and evidence that there had been a fire up there at some point. UGH. Somehow our cheap and cheerful reno took on way bigger implications. And thus, we entered into the money pit phase of the proceedings. Every previous tenant had complained about freezing temperatures indoors, about pipe leaks, about roof leaks. Once we removed the beadboard and tin tiles from the ceiling, exposing the warped gypse above, we discovered why there had been so many temperature issues. There was zero insulation between the ceiling and the roof. Nada. Nothing. Zilch. Plus the gap-filled windows and the hole-filled back door. For years tenants had just added layer upon layer of stuff to mask the issues or to make do. The landlords hadn’t made any improvements maybe ever. And so we now had years of damage to undo…

Stay tuned for more. And thanks for checking in.

xa

P.S. Not to leave you totally hanging in the Holiday shopping field, may I recommend Boucherie Lawrence for gifts (Plug Plug Plug! perfect for the teachers, janitors, grandparents, secret Santas in your life). Co, (the shop next to the butcher shop), is a place I really like that is sadly closing it’s doors at the end of the month. Everything is at minimum 20% off if not more and they have some cute gift options. Then there are all of the Holiday markets out there, way too many to list here, for some great locally-made gifts. And if you can, try to donate to the needy people out there- this time of year is hard on a lot of people and we are so very lucky.

Good luck out there!

Comments { 0 }

St-Adèle Project: Reveal

Hello friends! Long time no write. I’m going to jump right in with some pictures of my St-Adèle project. The job is, sadly, almost totally done and though I wish I could keep working with this client and this house, my initial mandate is pretty much complete. We are missing a couple of small things here and there but the bulk of the job is done. I am really happy with how it all turned out and I hope my client is too. For straight up images of the finished job, you can check out my portfolio on this very site under portfolio (!). But the blog, well the blog is for getting the scoop, for seeing the before and after pictures, for seeing the process. So welcome to the blog! I previously wrote about the project a while back here but if you are lazy or rushed for time, here is a brief recap: my lovely client has owned this country home for over 15 years and hired me to update the place. The goal was not to gut the house and start from scratch but keep what worked and build on that. Here’s a peak at my work.

Guest Bathroom before:

IMG_3764   IMG_4059

The vanity was really big and bulky. The toilet was massive. The floor, mouldings, vanity, and wall were all different woods. The room had no real visual punch or soul.

Guest Bathroom after:

AK-COTTAGE-033 AK-COTTAGE-034 AK-COTTAGE-036  AK-COTTAGE-039 IMG_1672

The inspiration for this space all started with the floor tile. Started with me falling in love with that floor tile. It was a deep love that quickly turned to deep hate when it took a million years to get here from Morocco. Then I forgave the tile once it was installed and saw how stunning it was. I mean! Just gorgeous. By removing the hard wood floor, we cut some of the woody-ness from the space. The white in the tile, on the walls, the new sink and new (more compact) toilet all helped brighten the room up. We had Treebone build a more narrow, floating vanity in teak. We had brushed gold bathroom accessories from Kholer.We kept the existing mirror and lighting- sconces that my client had previously bought- and we didn’t change the shower stall or tile. We just lifted everything up off the floor making the space seem bigger and better. Now the tile was the focal point, making the room light and bright and so very cool. I LOVE this room.

Office before:

IMG_3760 IMG_3763

The space was very “wood-y” and dark. The room didn’t flow. The sofa took up too much space.  It felt dark and busy.

After:

AK-COTTAGE-027 AK-COTTAGE-028 AK-COTTAGE-031 AK-COTTAGE-032

A beautiful, zen, soft and bright room that is so lovely to hang out in. Working with Steam, I had them build this beautiful storage furniture, that wrapped around two walls of the space. Removing all that shelving immediately brightened up the space and made the room instantly feel bigger. We painted the walls in the same color (Benjamin Moore Cloud White) as the built-in. The client now has tons of tucked-away storage and can still display art and books on the top. The carpet and chairs belonged to her already and the only addition was the Dot Line Suspension lamp from Lambert et Fils.

Master Bathroom before:

IMG_3783 IMG_3796 IMG_5455 IMG_5456  image3

The wood of the cabinets had some water damage and the overall aesthetic had a distinctly 80’s vibe going on. There was barely any counter space and the bulbous sinks ate up whatever top surface there was. This room needed an update and some upgrades.

Master Bathroom after:

AK-COTTAGE-008 AK-COTTAGE-003 AK-COTTAGE-007 AK-COTTAGE-005 AK-COTTAGE-006 AK-COTTAGE-009

I mean. Just look at it. This room is so sexy and cool. I am generally proud of my design but, guys can I just gush for a minute? I LOVE THIS ROOM SO MUCH. I kept the floor and instead of picking up the greys and pinks in it, I pulled out the black by adding more black to the space: black faucets, cabinetry, and new black shower tile. We raised the vanity higher off the floor and made it floating. I was fixated on having wall-mounted faucets and we happily found these Nostromo ones by Fantini, the company that also made the shower kit with the giant rain shower head. We reduced the sink sizes and installed these streamlined ones by Duravit. I had Treebone build the vanity, medicine cabinet and storage unit. We chose that beautiful rosewood for the medicine cabinet and storage unit. The rosewood has black streaks in it which went perfectly with our black colour scheme. The Lambert et Fils pendants add a different texture to the space and we installed these gorgeous Keuco mirrors with lights on the side. Raising the vanity, lifting the storage up off the floor, putting in a narrower toilet all contributed to making the master bathroom seem a million times bigger than before.

Bedroom before:

IMG_3777 IMG_3780 IMG_3778

This room was my client’s son’s room. Now 18, he tended to stay in the guest house on the property as opposed to the main house. The room ended up empty most of the time. It has a tricky shape with the two sloped sides- they slope practically down to the floor. My client suggested turning it into a walk-in closet to house her and her husband’s clothes as well as her husband’s vast collection of sneakers (that were slowly taking over the house ;-)) .

Walk-in closet after:

IMG_1676   IMG_1675

Working with Treebone again, we designed shoe storage built to fit into the slopes of the room. The shelves are on tracks and pull out so you can fit in quite a few pairs of kicks. We decided to keep the wall unit as it provided ample storage. Treebone also made the two mirrors for the angled walls. My client had the Le Corbusier daybed and the rug already. All that is missing is a glamorous chandelier and I think we made a pretty great walk-in. Also the tricky space is somehow less tricky with furniture that fits it just right. And now all the sneakers can have a home.

It was a really great, challenging, exciting project. The client was lovely and interesting and inspiring. The location was gorgeous and the hour-long commute was some of my most relaxing time in the past year. My only alone time too (haha. No, seriously, it was heaven: podcasts and music, and silence. God I’m going to miss that). More importantly, I had something that is all too rare in my line of work: time to get the details just right and the exact right budget to work with.

xa

Comments { 2 }

mile end project 4: the reveal

I have written about my Mile End renovation in this space before (see parts 1, 2, and 3 for a refresher) but looking back, my last entry about this project was in May 2014. MAY 2014. MAY!!!???? Holy smokes. The renovation was more or less finished last June/July. Then I ran off to get married. Then I wanted to give the clients time to settle back in. And then I wanted to get a professional in to take pictures. My website pictures have all been taken by me up till now and well, it was time to hang with the big kids and go a little more pro.This all apparently took 8 months give or take. I think that now, today, with Spring sorta kinda upon us, this is a perfect time to reveal one of my most favourite renovations to date. Not because it was the fanciest. I’ve done fancier and much less fancy in my lifetime. Not because it was the easiest. It wasn’t. Not because I really love these clients and they were a joy to work with. They were, but that’s not the reason. It is because I felt like I was changing someone’s life. It’s not saving a life by any means, it isn’t even that important in the scheme of things. But it is the renovation I’ve done that feels like it has had the most impact on a family’s life- we took them from a life lived in separate rooms to a big, open, spectacular space. We brought in more light, more colour, and more functionality. Also I really dig the design. Good design can change your life people!

Here is what it originally looked like:

IMG_0819  IMG_3037 IMG_3038

IMG_3036IMG_3035

The new floor plan:

IMG_5746

Without further ado, here is the big reveal:

Mudroom

We knocked the wall to the left of the entrance down, took over part of the former playroom and turned it into a mudroom. So now instead of walking into a tiny vestibule between two doors where there wasn’t even room to put shoes or boots or even coats, you walk in and to the left is this:

AK-HOUSE-003 AK-HOUSE-005

I designed the storage to work as well as possible for a family of four: closed storage above the new closet, sliding doors for easy access, hooks and baskets and a bench to get your boots on. There is enough room to bring the stroller or scooter or bike in. And I still love the tile from the Bouroullec Brothers for Mutina.

Powder Room

The other half of the former playroom was halved again to make the powder room and laundry room. Here is the new bathroom:

AK-HOUSE-009 AK-HOUSE-010

AK-HOUSE-011 AK-HOUSE-012


I chose a pretty neutral & small floor tile, a wall mounted toilet and a sink with a thin and light base, all in the interest of making the tight space seem bigger. I had a built-in made for extra storage. And then we had a crazy cool tile installed on the wall for a touch of fun. I love this little space!

Laundry Room

As mentioned above, the former playroom was cut into 3 to make a mudroom, a powder room and a laundry room. Formerly housed in the same room as the bathroom, I wanted to give my clients a dedicated laundry and storage space so that each area has its own dedicated purpose. Also your guests don’t want to see your dirty clothes when they go wash up before dinner!

AK-HOUSE-006 AK-HOUSE-007

AK-HOUSE-008 AK-HOUSE-050

The yellow door off of the kitchen leads you to the laundry room. Plenty of room for storage,washing and drying. I used my beloved Chicago penny round tile for the ironing board wall. The small grey tile repeated here on the floor, the grey appliances, and grey cabinets are made so much more interesting by the pops of yellow and red.

Living Area

This is what you see when you walk in now: space! Beautiful wide open space.

AK-HOUSE-018 AK-HOUSE-015 AK-HOUSE-016 AK-HOUSE-019


I want my clients to paint their coffee table and get some cushions and get a rug and hang some art. That’s coming up. But for now, holy cow, what a great, light-filled space.

The Kitchen

Working once again with Steam, I think we came up with a gorgeous, timeless, dream kitchen space.

AK-HOUSE-026 AK-HOUSE-023 AK-HOUSE-024 AK-HOUSE-035 AK-HOUSE-027 AK-HOUSE-028 AK-HOUSE-036 AK-HOUSE-027

Grey cabinets, white quartz counter tops, gorgeous marble backsplash, steel painted black for behind the stove, a big old chunk of wood “resting” on the island with a black steel base, prep space, tons of storage, and a lovely little built-in bench that is the sunniest spot to have a cup of tea and read the paper or to snuggle up with a little one and read stories. The brass handles and the yellow light are extra details that make it all just work together so well. As my son would say:” I don’t like this kitchen. I LOVE IT!”

Dining Area

Across from the kitchen and right next to the big new window, is the dining area. We can’t talk about rooms when there aren’t any 😉 .

AK-HOUSE-044 AK-HOUSE-045 AK-HOUSE-020

AK-HOUSE-037 AK-HOUSE-038

The clients have kept their old table (for now) and added colourful chairs to go with the color pop theme. I had a bookshelf built-in and painted a gorgeous peacock color. We designed a built-in bench in Russian Ply with storage for all of the legions of toys.  The light is from West Elm and it’s hardware is brass to refer to the kitchen drawer handles. The fabric for the bench is a multicoloured stripe indoor/outdoor fabric that I’ve used a couple of times before, including on my own dining room chairs. Spills wipe right off. Under the staircase is kid world: so mom and dad can enjoy a glass of wine at the table, and kids are close by.

Pretty, functional, and a great spot for a meal or some Lego building.

The Stairs

We ripped out the original stairs that were blocking off so much space and so much light, and instead of coming into the middle of the space and facing a wall, the new stairs are tucked against the wall and you come into the wide open space.

AK-HOUSE-021 AK-HOUSE-040 AK-HOUSE-041

As stunning as they look and as much as I love the design, these stairs were hands down the biggest stress on this entire project. To save some money and because we liked the guy, we went with a welder used to building exterior metal staircases when we should have gone with a regular staircase person. The stairs were eventually over budget so we didn’t save any money and a couple of dumb mistakes were made. And yet they are strikingly beautiful. Lesson learnt: if you are going to have a statement piece of furniture made, don’t try to get a bargain.

And now a word about interior design photography. Doug Hollingworth took these reveal pictures. Pretty, right? Zen and minimalist and light filled, don’t ya think? Yes, but also to get this:

IMG_5592 Doug at work.

We had to do this:

IMG_5594IMG_5593IMG_5595

So the next time you go and give yourself a hard time because your house doesn’t look like a magazine or Pinterest or whatever, remind yourself that behind the gorgeous island in the photograph is hiding a pile of crap. We spent a lot of our time during this photo shoot moving everyday stuff and kid’s toys, and just stuff. And that is life and good design in my book: design a house for playing in, for laughing in, for loving in, for hosting in, for spontaneous dance parties and tons of guests, and lego exploding everywhere. Design homes for living in. And have some space to hide all of it when you want to do a fancy photo shoot. I feel like this was a success for exactly that reason: my clients are happy, they host huge dinners, they have dance parties, they have lego everywhere. And they’ve recently gotten in touch so that I can help them with the last little details: rugs and stools for the island, curtains for the front window, cushions, art on the walls. All the things that will warm up this space.

I guess that means that there will be a Mile End Project part 5? A reveal of the reveal? Maybe I can talk them into a rooftop master suite, keep this project going a little longer…

xa


Comments { 3 }

 Hello, again!

You know there are two things that I can’t stand in the world of Blog: checking in with a site that has no new information for weeks and weeks and weeks. And reading posts where the writer bitches and moans about how badly they feel about not writing in so long. As you will soon read, I am officially guilty of both of the things! Ugh. I will spare you all of the multitude of reasons why I have been radio silent and tell you about four of the reasons.

#1 NO TIME: lots and lots of work (yay!), lots of kids to take care of (only 2 but they keep me super busy), lots of housework (yuk), lots of social commitments (yay!).

#2 FEAR: the longer I went without writing, the less inspired I was to write, the more paralyzed about writing I got. Classic Annika styles.

#3 WINTER: for the first year since I’ve had kids, I have fully taken advantage of outdoor winter fun-skiing, skating, sledding, trips to the country. Maybe it is my children being older and therefore less whiny about being outside in -20 weather. Maybe it’s because I finally have learned to dress for cold weather after a lifetime of living in it. Maybe it’s because I am more active and my husband is crazy active (or an elite athlete as he likes to call himself ). This year, any “free” moment has been spent out of the house.

#4 TECHNOLOGY: yes, I’m going to go there. I’m going to blame all of technology for my sorry contribution to this website. My website kept getting spammed and hacked ( to those of you who wrote in and had emails bounce or got no response back, I deeply deeply apologize ). My home computer was up in arms and refusing to work at it’s usual decent speed making even writing the simplest email total torture much less writing and researching for the site. I wanted to start the year offering you two reveals: one of my amazing Mile End Project and the other of a quick and lovely bathroom renovation. I even lined up a professional photographer to capture the spaces. His camera broke before we could start and he is still in the process of getting it fixed. You see? ALL of technology conspired against me.

But now, as of now, no more bullshit. No more procrastination. No more giving myself a hard time. About writing that is. Consider this my THREE (!!!) month late New Year Resolution: I will write again. I will write often or sometimes. I will write big posts and small posts and no posts. And it will be ok. It will be fine. I will stop beating myself up over it. And hopefully, some of you will continue to join me on this ride. I will try to make it worth your while.

For my first day back (and to ease myself back in a little), I thought I’d give you a sneak peak at the job I have been spending most of my time on. As I previously mentioned here , I got the amazing opportunity to work for a great new client. This is someone that has a creative eye, a healthy budget, and no major deadlines so there is the time to get things right and without compromise. Often in my line of work, either budget or time constraints mean that some part of my vision for the client or the space will have to give. In this case not so much. I’ll take you through a couple of the spaces that I am attacking on this project which I am calling St-Adèle.

The house is a country home that was last decorated about fifteen years ago. Many of the furniture pieces were culled from various other properties. I’ve been hired to update the space and make it more cohesive.

Guest Bathroom:

IMG_3764IMG_4059IMG_3765

This is a nice little bathroom and it is more than decent size wise. But the vanity is too big and heavy for the space, the toilet too bulbous, and the room too wood-y. I was inspired by these images:

1.ac8853afa53f141a9938388af4228a3a 2.852901c03435e58084dea2e61dc4bfbb 3.afcf2da9e7f370f3de5863943ee874ce

(1) From The Design Files; (2) from De De Ce; (3) from Homelife.

My goal was to lighten and brighten and modernize. I wanted to have a vanity made that would be floating off the floor and not taking up the entire width of the space. I wanted bright tile on the floor (with heated coils beneath it) to cut out all the contrasting woods. I wanted sleeker fixtures.

At Ramaccieri Soligo, I was shown this brand new cement tile and I paired it with this new-on-the-market faucet finish called Vibrant Gold from Kholer:

IMG_4758 ProductDetailTemplate

(It will look more tarnished as in the picture on the left)

I am head over heels in love with this tile. The white is bright and the grey bits match the shower tile which I am keeping. And with the old gold of the faucet, it is going to be just gorgeous.

For the vanity, I am working with a company called Treebone Design. They are located in the Mile-Ex neighbourhood of Montreal and they make beautiful wood pieces. I think we are going to go with a pale teak for the vanity-  not too orange or too yellow. We are getting a slab of Nero Carrara marble from Ciot for the counter. It looks so beautiful with the tile, picking up the black, grey, and white theme. We’ll pop this sink on top:

1653774_web2_prod_normal_2 + FullSizeRender-2


As soon as the tile arrives, we will rip out the floor, the old vanity, the convector on the wall, and the toilet. We’ll install heated coils then lay the tile down. We’ll pop our new vanity, counter, and sink in. We’ll remove the existing granite shower sill and put in a marble one to match our counter. We’ll install a new toilet and new accessories (also from Kholer in Vibrant Gold). Paint the walls in a nice bright white. Bingo bango brand new guest bathroom! I can’t wait.

Office:

IMG_3760 IMG_3763 IMG_3762

This is an office/library. It is a lovely space but it is serving so many different purposes that it ends up not getting used properly or purposefully. The idea here is to sleek it up, clean it up, and add storage so that all of the busyness can get tucked neatly away. When there is less clutter, you can make the objects that you truly want to have shine (in this case artwork and family photos and the pretty desk), shine. Another problem in this room is the overabundance of different woods: the knotty pine shelves, the birch desk, the old ceiling beams, the exposed original walls. Too much brown.

My mandate for the room is to clean it up, add storage, brighten the room up. Originally, I wanted to keep the knotty pine shelving and add storage below it. I thought we could paint the new lower cabinets a nice white and match the wood to the new cabinets. Then my contractors started talking me out of that-they felt that the shelves would need lots of repairs and tons of sanding, and they worried about colour matching. I resisted at first. My goal is not to rip everything out here: honestly that is not the kind of designer I am. I love eclectic design; I have eclectic tastes. I want to reuse as much as we can and there is a lot in this home that we should be reusing. Anyhow, when my client stated that she wasn’t attached to the shelves in any way, the decision was made easy for me. So the knotty pine will go. Building the lower cabinets are my go-to cabinet makers Steam. Their designer Patrizia and I work so well together- she is a dream come true. We came up with a clean and bright design for the space:

unnamed-1unnamed

Tons of new storage to tuck away all the clutter, the counter tops are ready to hold some family pictures and artwork. Some books and magazines can be placed on the two floating shelves. From my client’s Montreal apartment, we will bring in this rug and this Eames chair and ottoman:

FullSizeRender-2 + Eameslounch


In a few short days, we will demo the old shelves, remove the couch, paint the walls Cloud White CC-40 (same as the new cabinets), change up the artwork, move the desk in between the two windows, install the new Steam furniture. I think the room will be a bright and relaxing haven, a place to work or to read by the window. I’m very excited!


So there it is folks. A glimpse at some of the work that I’ve been up to. I’ll have pictures of the finished office in a couple of weeks.

This writing process never ceases to amaze me: it took me soooooooo long to get writing again. I’ve spent what little time I’ve had these last two days writing this post.  BUT once I start, I can’t stop. It is such a great exercise for me. Maybe if I could afford an assistant to talk to and hash out the work with, I wouldn’t need to throw all this out in the universe. Maybe that’s why some people have blogs: they don’t have anyone to talk to about their passions or their work. Hmmm…I don’t know. All I do know is that it really helps me to clarify my vision for the spaces I’m working on, to work out problems I’ve been wrestling with, to make me see the cohesion (or lack thereof) of the overall space, the big picture. Just in writing this post, I’ve resolved two issues that were nagging me and remembered something I’d forgotten. So as much as I can find the process of writing at times difficult and long, it truly benefits my work. I see that now. I hope it will benefit my client’s life. And maybe some of you out there.

Thanks for checking in.


xa


Comments { 0 }

GIFT GUIDE 2014 (part 2)

Somehow, every year, our Holiday shopping list grows. Before you have kids you buy for family and maybe for friends. Once you have kids, you quickly axe the friends but then add on more family and then throw teachers and caregivers in the mix. Then, if someone is doing the legwork for you, i.e. taking over hosting duties, you need to consider a hostess gift. You’ve also got to stuff the stockings if you do that kind of thing. Basically it never ends. Here are some ideas to get you started on the tough road ahead.

FOR THE HOSTESS & THE TEACHERS

A really nice bottle of wine or flowers are a great starting point for the person that will be cooking for you and your family (probably for many many hours). And for the persons taking care of your children all day, well really nothing is good enough. Still, there are more options out there, options that are not dependent on wine knowledge and options that won’t be dead or wilted by the end of the evening. Hopefully.

edff1db511ea69693cc7ee7f6444b412 148f9a1f298a57681f84d82a803470bc ffe0b2b4a28e492dcc6fad043119f98e

I am a big fan of offering quality food gifts. Not only because I can shop at our great butcher shop, but also because these are gifts that keep on giving and you are supporting locally made products. My go-to faves are the delicious treats made by Camilla Wynne and Preservation Society. Always a clear winner.

1.tumblr_nfk6lxmEMc1qmp3pao1_5002.73638d1ae08fff8661b1e0527ed8a10d

3.17b61251be06077f23accc9f137813b84.30571749_010_b

Love this balsam fir incense which you can find at Annex Vintage in Montreal. Instead of flowers, why not offer edible ones? Such a sweet hostess gift! Or this beautiful hypericum from Terrain. Or get a beautiful vase and fill it with flowers. I think I really like hypericum.

4.895d7021e541f342d3fa48e1eaff6e405.29322906_901_b

6.bd655c63815238e45bf35fd91c4aa67f 7.5ace972268005ae525bc958a84452e05

Love these small kitchenware gifts. Sweet but with personality. The first three would make for lovely teacher gifts. As for the maple board with the neon handle: maybe you could buy some nice cheese for your party and deliver it to the host on the cutting board that they then get to keep? Now that’s a nice hostess gift!

STOCKING STUFFERS

We go pretty basic over here with the stocking stuffers: nicely packaged soap, tiny toys, moleskines, sweets. But here are some stuffers with a little kick to them:

8.96adcc3451f2ab0ecb8e5b093dcc7803 9. 30566921_070_b

10. cfb573081e62e4e9fda4b2151e4aca1411.f885cb31aab1126d78af909485258623

12. d082c6da6782b898470e9075d42930ae 13. 0ec91978a3e041f92df74d5710fa5bf5

14.tumblr_ndlo7kX4No1qmp3pao1_50015.844047f013bef5ef9ea69a93725e96a2


Cute, affordable, thoughtful- all the things you’d want from a stocking stuffer. The temporary tattoos and the cubebots are available here in Montreal from Galerie Co.  The bowls and earrings are Etsy finds. The playing cards and the washi tape (my dream stocking stuffer is basically tape) are from Anthropologie. The penguin stacking game is from Muji. And the men’s beauty care line is from Annex Vintage.

Giving the people you love special, thoughtful treats is gravy, a bonus really. But truly, spending time with loved ones is the best part of the Holiday season. And if you have it in your families’ budget to give a little extra this year, think about the charitable organizations in your community or international ones that you can donate money or time to. We will be donating to The Mile End Community Mission and a great charity I like to support is Heifer International.

I wish you all happy, healthy, and safe Holidays.


xa


Comments { 1 }